2010-04-20

Meeting Malifaux


Man procrastination and internet troubles are a pain... This was supposed to be posted Saturday. On Friday, a buddy and I went to a demo for Malifaux our FLGS was hosting. It's definitely an interesting game.


I originally learned about the game on accident while looking at 40k models. The Rasputina box art called me when I'd turned away from the 40k rack. While I was looking at the starters, one of the store workers mentioned to me that they were having a demo for the game on Friday.


I played a crew called Lilith's Brood, which is apparently one of the 'native' daemonkin groups. It had Lilith herself, and 3 'ages' of a creature called a Nephilim. These models are interesting in that in the game they can 'grow up' to their next level. The first of these levels is called a 'Terror Tot' and is the weakest of the 3, the next one is a 'Young Nephilim' and gains a number of abilities over it's younger brethren (including an extra attack and the ability to 'fly' over terrain.) Finally is the 'Mature Nephilim' which has some more special things, but I don't remember the particulars. My crew consisted of Lilith, 2 Terror Tots, a Young Nephilim, and a Mature Nephilim.


My buddy (and as it happened, opponent) played The Redchappel Gang, which was basically the Mad Hatter and his gaggle of undead hookers. His crew was Seamus (the leader), Madame Sybelle, 3 'Rotten Belles', and Copycat Killer.


The first thing I feel should be noted, is while I'd heard that all you need to play is a starter box and a deck of cards each, plus the main rulebook ($35). The Lilith's brood doesn't actually make a legal crew. The starter set comes with Lilith, a Mature Nephilim, and 3 Terror Tots. So if I decided to play this group I'd immediately have to purchase a Young Nephlim blister (which does come with 2 Young Nephlim) to get enough points worth of models for the basic 25 point game. Granted, this brings the start up cost from $34 for the starter, to $50.50 ($34 starter + $16.50 blister). From what I heard on the crew my buddy played, he wouldn't be able to make a legal crew without a blister as well. The Copycat Killer being the model that doesn't come in that crew's starter. Granted, $50 for a playable startup is pretty good for a miniatures game.

Interestingly, Malifaux is a dice-less system. Instead it uses a deck of cards and has the option to 'cheat fate'. Each player has their own 54 card deck (a standard deck + 2 jokers). The numbers on the cards represents the 'roll' the card represents, while the suit represents the card's aspect. The aspect does a number of things from determining if a special ability triggers to playing damage multiplier. They do make their own decks, called fate decks, which make it easier to play as you don't have to remember where damage level cutoffs are, nor do you have to refer to the suit conversion.

Unlike 40k (or Warmachine from what I hear), models are 'activated' individually instead of the entire force at once. Activation involves choosing a model and expending it's actions. In Malifaux, a model has a base 2 'actions' which may be spent doing a number of things, such as moving, attacking, charging, casting a spell, etc. Different activities have a different number of actions they cost. For example, charging costs 2 actions instead of one, but moves further then a single move action, and includes an attack against a model. Any one model may only be activated once each turn. Players trade off activating a single model each until all models have been activated. Then end of turn stuff happens (mainly reshuffling the discard into the active deck). This is a mechanic I really like, and is similar to the one in Rezolution.

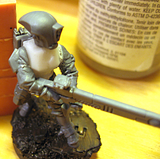
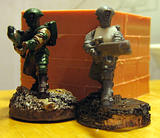
All in all it's a pretty interesting game, rules wise. I haven't been able to read up on the fluff of the setting or game, but if the models are any indication, it should be rather interesting in a steamtech meets magic kinda way.

Images from the Wyrd Games site, used without permission.

2010-04-12

Another Tau Female Torso pic


Excuses, excuses, I know. At least I have a good one this time on why I haven't posted much. I managed to gash open my finger working on cleaning up some casts. The gash (which is healing up rather nicely) was about 2 mm deep in the center, shallowing as it neared the edges as my finger is curved, but the X-acto knife wasn't. Luckily I didn't need any stitches. I'd post a picture, but I haven't been able to get a good one only using one hand. >.>

Anyway, I'm mainly posting another picture of my Female Tau Torso. Sadly there aren't a lot of non-across the chest poses without some serious work, and as I mangled my finger, wasn't willing to do. I hope this pose is a bit better to see the torso. I've also decided I need to set up a dedicated photo box to photograph miniatures in. >.<

2010-04-07

Female Fire Warrior First Assembly


My female Fire Warrior torso next to a stock torso. Apparently I've decided female Tau are taller and narrower then male Tau. I gave the female torso a quick wash so it would show up in the camera. Looks like I caught an air bubble in the belt buckle >.<

I had suspected that making the torso narrower would have issues. Not that I don't have issues anyway connecting Firewarrior arms to normal torsos. I should ask OSH's help desk if there is a trick to it >.>

Photobucket
The glue holding her off arm looks odd as I dropped her into my water cup on accident while it was drying, causing the superglue to react oddly. Oh well, it'll need some clean up.

Photobucket
And next to one of my painted FWs. I'll have to paint her up for a better comparison ^.^

However, all in all, I like how the female torso came out this time around. I neglected to get any pictures of the process I went through to cast the torso, so that'll have to wait.

Random thought: Has anyone else noticed that the citadel washes have a sweet taste to them?

2010-04-02

Devilfish Chassis


As I'm leaving for the weekend to help repair the plumbing of my parent's old school house, I wanted to get this posted before I left. I'd been working on it off and on for weeks (I started it before the Fire Warriors). It's the hand painted chassis, not the airbrushed one. The nose gattling itself isn't painted as I completely forgot about it due to the modular nature of my fish.


All my devilfish chassis (except one, which I got used and would be too annoying to remove the nose-gun) are modular to be able to play the roll of Devilfish, Hammerhead, or Skyray.


Also, does anyone know what Blogger does with images uploaded to the blog, but then not used?

2010-04-01

2 Part Mold Making Part 2


2 Part Mold Making Part 2!

Hello again, the silicone from last time has cured so we're going to move on to the next step.

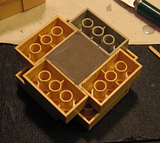
First off, the mold is flipped over to reveal the clay support from last time.
Photobucket

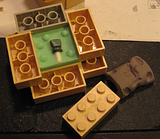
It's carefully peeled off the mold as we want to try and get as much of it as possible with this first removal. Often I'll remove one of the blocks in the wall to get a good starting position.

Photobucket

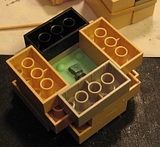
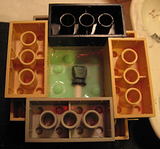
After it's been removed, look over the mold for any bubbles that had formed against the piece. Be careful to NOT remove the piece from the mold, it needs to stay sealed to the silicone at this point. If there are any obvious bubbles, decide if they're worth redoing the side of the mold. Also while doing this, use a cheap toothpick (the ones that are flat and have a fat end and a skinny end) to gently scrape up any residual clay left behind. I'd probably get better results with the clay if I'd use new (and proper) clay every time, but it's what I have, and it works well enough. A layer of blocks is added to the bottom to form a deeper space to fill with silicone.

Photobucket


Now we need to prevent the silicone we're going to be adding from bonding to the silicone that already exists or we'll end up with a block of silicone with our part trapped inside. I've tried a number of things to do the job. This includes a variety of 'official' mold releases, vasaline, vegtable oil, etc. But what I've found works as well as the official releases and is orders of magnitude cheaper... is Elmer's white school glue. Yes, the cheap stuff you can pick up for a nickel a tube right before school starts each year. Take the school glue and use or transfer to another container about half of it. Then refill the bottle with distilled water (normal water works too, but adds other contaminants which may or may not help) and a drop of liquid detergent. Either dishwashing or clothing detergent work, I use whichever we happen to have for our laundry/dishes at the time.

Photobucket


I have an old brush I have dedicated to being used with waterbased glues. I use it for making bases and terrain as well, so it's not only for mold making. But a brush should be dedicated as the glue changes how the bristles on the brush react making it hard to paint with it later. Anyway, put a few drops of the 1-1 glue we made someplace and then brush it over the silicone rubber surface of the mold. Try to avoid getting it on the model itself, but make sure the rubber by the model is covered. It doesn't take a thick layer, just some. I've found mine tends to want to puddle a bit while it's trying to dry. Just use the brush (damp with water or 1-1 glue still) to pull the wet glue back out to the higher points of the mold.

Photobucket


After this glue has dried. We repeat the procedure last time and hmm... aparently I didn't take a lot of pictures of that stage, so I'll do a quick synopsis with more pictures.

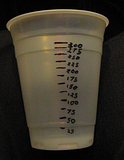
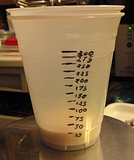
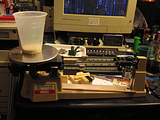
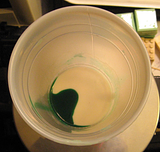
I didn't get a picture of it, but first I weigh the inner cup that I'll be putting the silicone in. This gives me the offset I need for calculating how much catalyst I need. I use a 2 cup measuring system. It's made by taking 2 cups and sticking one inside the other. Water is then added in known incremements to the inner container, and the outer is marked for each incremement. This way I can replace the inner cup and not have to relabel my cup every time. I can't remember where I learned of this idea, but it's not originally mine. After measuring out volume of silicone I want, I remove the marked cup (as I didn't weigh it too,) and weigh the silicone.

PhotobucketPhotobucketPhotobucket


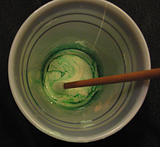
After calculating the needed amount of catalyst ({silicone+cup} - {cup}) * 0.03. I add the catalyst to it and mix.

PhotobucketPhotobucket


The pouring is identical to the before and is hard to take a picture of while doing it, so I don't have any pictures of that.

I'll probably do a post on casting with the mold sometime in the near future as well.